
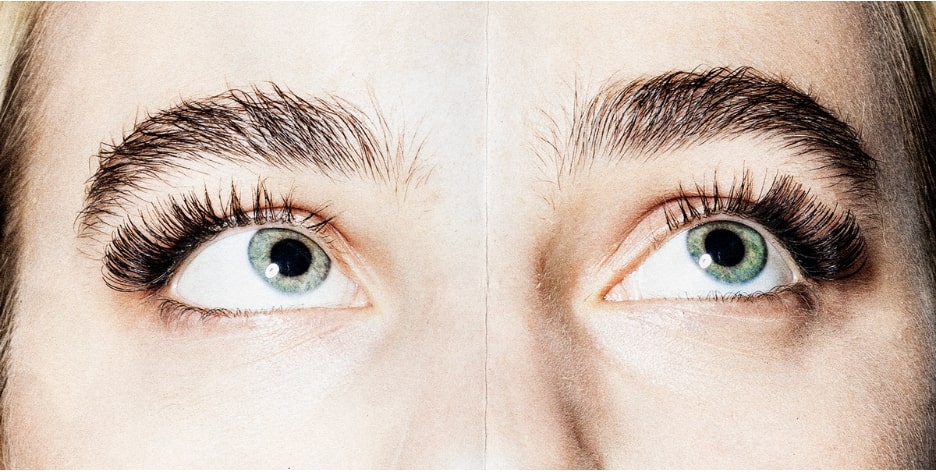
Learn how to remove false eyelashes like a pro! With the right techniques and a gentle touch, you can safely and easily remove them without damaging your natural lashes or skin.
Prepare Before Jump into How to Remove False Eyelashes
Before jumping into the process of how to remove false eyelashes, it’s essential to know what were false eyelashes originally called and prepare yourself and the necessary tools to ensure a smooth and safe false eyelashes removal. Some steps to take before starting the false eyelashes removal process: know what were false eyelashes originally called and prepare yourself and the necessary tools to ensure a smooth and safe false eyelashes removal.
Gather Your Tools
Before you begin how to remove false eyelashes process, gathering all the necessary tools is essential. Having everything ready will make the process smoother and more efficient. Here’s what you’ll need:
- Cotton swabs or cotton pads
- An oil-based makeup remover
- A clean towel or tissue
Once you have these items, you can learn how to remove false eyelashes!
Prepare Your Lashes for False Eyelashes Removal
Start by washing your hands thoroughly to ensure they are clean. This step is crucial as you don’t want any dirt or bacteria to transfer onto your eyes during false eyelashes removal.
- Remove Eye Makeup: If you’re wearing eye makeup, gently remove it using a mild cleanser or makeup remover. It’s essential to cleanse your lashes and lids properly before proceeding with how to remove false eyelashes process.
- Apply a Lash Cleanser: Apply a lash cleanser or a gentle eye makeup remover to a cotton pad.
- Close your eyes and gently swipe the pad over your lashes and lids to remove any remaining makeup or oils. Remember to be gentle and avoid rubbing or pulling on your lashes, which can cause damage.
Following these steps, you can adequately prepare your lashes for a smooth and damage-free false eyelashes removal experience.
Step-by-Step Guide on How to Remove False Eyelashes
In this section, we’ll walk you through each step of the how to remove false eyelashes, providing helpful tips and troubleshooting techniques along the way. With patience and a gentle touch, you can ensure a smooth and hassle-free experience, allowing your natural lashes to shine beautifully once again. Let’s begin achieving a seamless and comfortable false lash removal process! So, let’s dive in and learn how to remove false eyelashes like a pro!
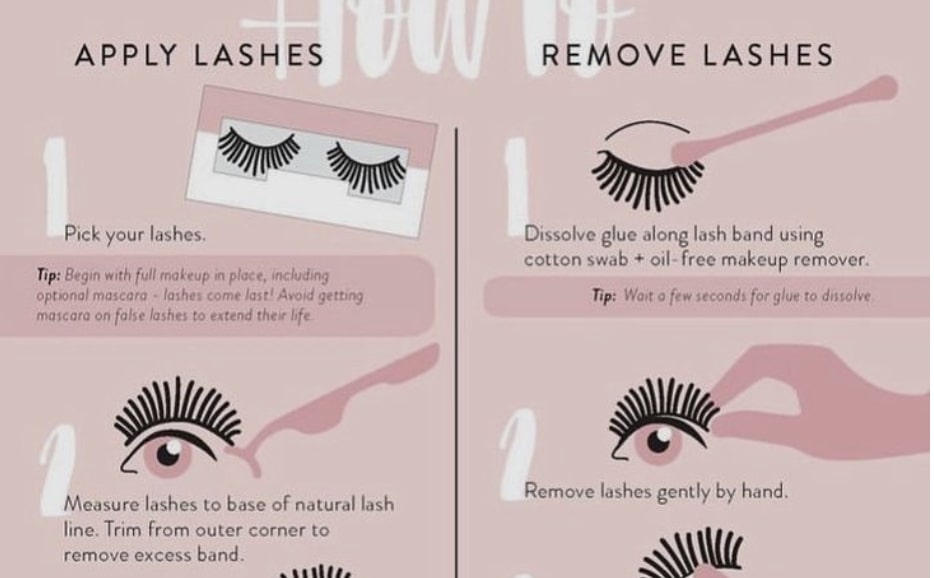
Step 1. Apply an Oil-Based Makeup Remover
How to remove false eyelashes is a common question among many people who love to enhance their eyes with these beauty accessories. False eyelashes can add length, volume, and drama to your natural lashes, but they can also be tricky to take off without causing any harm to your eyes or natural lashes. To effectively remove false lashes, follow these steps for using an oil-based makeup remover:
- Pour a small amount of an oil-based makeup remover onto a cotton pad or dip a cotton swab into the product. Ensure the pad or swab is damp but not dripping wet.
- Close your eyes and place the saturated cotton pad or swab along the lash line, where the false lashes are attached. Be gentle and avoid getting the remover in your eyes.
- Allow the makeup remover to soak into the adhesive for a few seconds. The oil in the remover will help break down the glue, making it easier to remove the false lashes.
By following these steps and using an oil-based makeup remover, you can safely and effectively remove false lashes without causing any harm to your eyes or natural lashes.
Step 2. Gently Slide and Wiggle
Using your fingertips or tweezers (if you have a steady hand), gently slide the false lash from one end to the other. Be extremely careful not to tug or pull forcefully, as this can cause damage to your natural lashes. If you encounter any resistance while sliding, stop immediately and apply more makeup remover to the area. Give it a few more seconds to work its magic before attempting to remove the lash again.
- Be Patient and Gentle: Once the false lash starts to loosen, gently wiggle it back and forth to loosen the adhesive further. This motion helps ensure you remove the lash without causing discomfort or harm to your eyes. Remember always to be patient and gentle when removing false lashes. Rushing or being too rough can lead to damage or irritation.
- If you’re having trouble removing false eyelashes, use a cotton swab soaked in makeup remover to loosen the adhesive carefully. This can help make the false eyelashes removal process easier and less painful.
- Take Your Time: After successfully removing the false lash, take a moment to inspect your natural lashes. If you notice any clumps of adhesive or makeup residue, gently clean the area with a clean cotton swab dipped in makeup remover. It’s important to take time and ensure your natural lashes are clean and free from any leftover adhesive or makeup.
- Once your natural lashes are clean, you can apply a nourishing lash serum or oil to help promote their health and growth. This can also help prepare them for your next application of false lashes.
By following these steps and taking the time to remove your false lashes with care, you can maintain the health of your natural lashes and ensure a smooth and comfortable false eyelashes removal process. Remember always to be gentle and patient; your lashes will thank you for the extra care!
Step 3. Remove the False Lash
With a gentle touch, continue sliding and wiggling until the false lash is completely detached from your natural lashes.
- Ensure not to rush or be too forceful, which can result in damaged lashes and irritated skin.
- If any remnants of adhesive are left on your eyelids, use a clean cotton swab dipped in makeup remover to gently rub away the residue.
- Remember, patience is critical during this process.
Taking your time and being gentle will ensure a smooth and safe process of how to remove strip lashes without causing any harm to your natural lashes or delicate eye area. Don’t be too harsh on yourself while learning how to remove strip lashes. Remember, practice makes perfect, so don’t get discouraged if you don’t master the technique immediately. You can watch video tutorials or seek advice from experienced makeup artists for additional tips on removing strip lashes effectively. With patience and a steady hand, you’ll soon become confident in removing strip lashes like a pro!
Step 4. Cleanse Your Lashes
After how to remove false eyelashes process, it’s important to cleanse your natural lashes thoroughly. Dampen a cotton pad with warm water and gently wipe along your lash line to remove any remaining makeup remover or adhesive traces.
- Drying Your Lashes: Drying your lashes properly is equally crucial. Gently pat them dry with a clean towel or tissue, ensuring they are completely moisture-free before proceeding.
- Applying Lash Serum: Once your lashes are clean and dry, you can apply a lash serum to promote growth and health. Use a clean mascara wand or a specialized lash brush to apply the serum evenly along your lash line. Did you know that lash serums contain ingredients like peptides and vitamins that nourish and strengthen your lashes?
- Avoiding Mascara: While natural lashes recover from wearing false lashes, it’s best to avoid using the super false lash effect mascara. Mascara can weigh down your lashes and make them more prone to breakage. Give your lashes a break and let them breathe. Also, remember to avoid using the super false lash effect mascara when wearing false lashes. Doing so protects your natural and false lashes, ensuring they stay in excellent condition for longer.
Embrace your natural lashes and the benefits of lash serum to keep them looking beautiful and healthy. With proper care and nourishment, your lashes will be ready for their next glamorous adventure!
Step 5. Nourish and Condition
Now that your lashes are clean and free from any residue, it’s time to give them some extra love and care. Apply a nourishing lash serum or oil to promote healthy growth and keep them in excellent condition.
- Use a Lash Serum or Oil: Gently brush the serum or oil along your lash line using a clean mascara wand or a cotton swab. This step will help strengthen your natural lashes and prepare them for future use of false eyelashes if desired.
- Natural Oils: Consider using natural oils such as coconut, castor, or sweet almond oils to condition your lashes. These oils are rich in nutrients that can hydrate and nourish the lashes, keeping them soft and supple.
- Avoid Harsh Makeup Removers: When removing eye makeup, use gentle makeup removers that won’t strip away the natural oils from your lashes. Opt for oil-based or micellar water-based removers that effectively remove makeup without causing dryness.
Following these tips and incorporating lash-nourishing practices into your routine, you can keep your natural lashes in top condition. Healthy lashes will enhance your overall eye appearance and serve as the perfect foundation for future false lash applications. Remember, well-cared-for lashes are beautiful lashes!
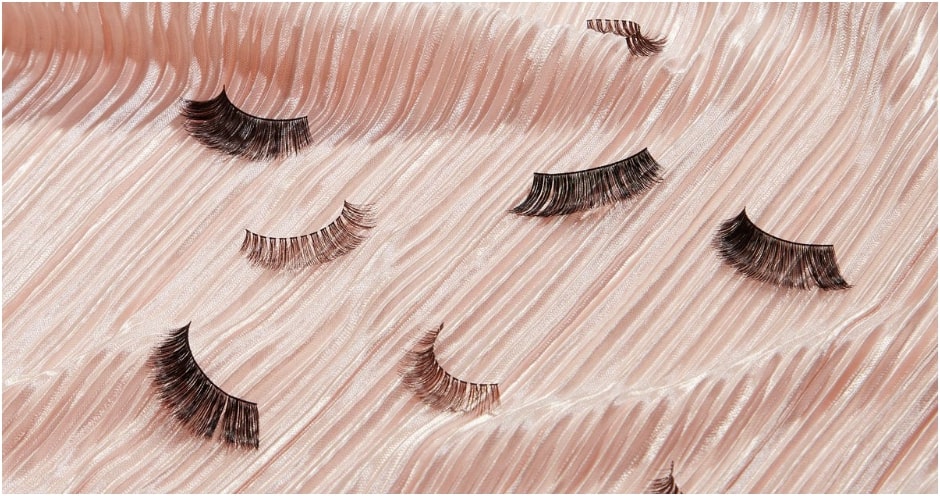
Step 6. Store Your False Lashes Properly
After removing and cleaning your false lashes, storing them correctly is essential to maintain their shape and prolong their lifespan. Here are a few tips:
- Remove Adhesive and Sanitize: Remove any remaining adhesive from the lash band using tweezers or fingers. Gently wipe the lashes with a makeup remover wipe or a cotton pad soaked in rubbing alcohol to sanitize them
- Proper Storage: Place the lashes back into their original packaging or a clean storage container, ensuring they retain their curve. Avoid storing your lashes near moisture or direct sunlight, as these can cause damage or deform the lash band
Storing false lashes properly is crucial for maintaining their shape and prolonging their lifespan. By following these steps, you can keep your false lashes in top-notch condition, ready for reuse whenever you desire. Remember, proper storage will ensure they stay in perfect shape for longer use.
Troubles hooting Common Issues while Learning How to Remove False Eyelashes
While how to remove false eyelashes is usually a straightforward process, there may be instances where you encounter some challenges. Here are solutions to common issues:
- If the Glue Is Stubborn: If the glue used to attach your false lashes refuses to budge, try applying a warm compress to the area. Soak a clean cloth in warm water, wring out the excess, and place it over your closed eyes for a few minutes. The heat will help loosen the adhesive, making it easier to remove the lashes.
- If Your Natural Lashes Get Pulled: In some cases, you may accidentally pull out a few natural lashes while removing false ones. If this happens, resist the urge to panic. Remember that your lashes will grow back in due time. In the meantime, use an eyelash growth serum or mascara with lash-enhancing properties to encourage regrowth and promote healthy lashes.
- If the Lashes Don’t Stick: If you’re having trouble getting your false lashes to stick, ensure you apply enough adhesive. Use a high-quality lash glue and apply a thin, even layer along the lash band. Wait a few seconds for the glue to become tacky before applying the lashes. If the lashes still won’t stick, use a lash primer before applying the glue. This will create a better surface for the adhesive to adhere to.
- If the Lashes Look Unnatural: If your false lashes look too dramatic or unnatural, try trimming them to fit your eye shape. If necessary, measure the lashes against your natural lash line and trim them from the outer corner. This will create a more natural and comfortable look. Additionally, consider using individual lashes instead of strip lashes for a more customizable and natural appearance.
- If the Lashes Irritate Your Eyes: If your false lashes are causing irritation or discomfort, it’s possible that you may be allergic to the lash adhesive. Try using a hypoallergenic lash glue or switch to a different lash brand. If the irritation persists, it’s best to consult a dermatologist or ophthalmologist for further evaluation and guidance.
If you experience any persistent issues or discomfort with how to remove false eyelashes process, consult with a beauty professional for personalized advice and solutions. Proper false eyelashes removal ensures the health and beauty of your natural lashes for future applications.
Conclusion
Learning how to remove false eyelashes doesn’t have to be a daunting task. Explore how to apply false eyelashes and get ready to enhance your eyes effortlessly. With the right tools, techniques, and a gentle touch, you can safely and easily remove your false lashes without hassle. Just remember to be patient, take your time, and follow the steps outlined in this guide. Doing so keeps your natural lashes intact and ensure a smooth false eyelashes removal process every time. Happy lashing! Explore how to apply false eyelashes to achieve stunning results.
Napsat komentář